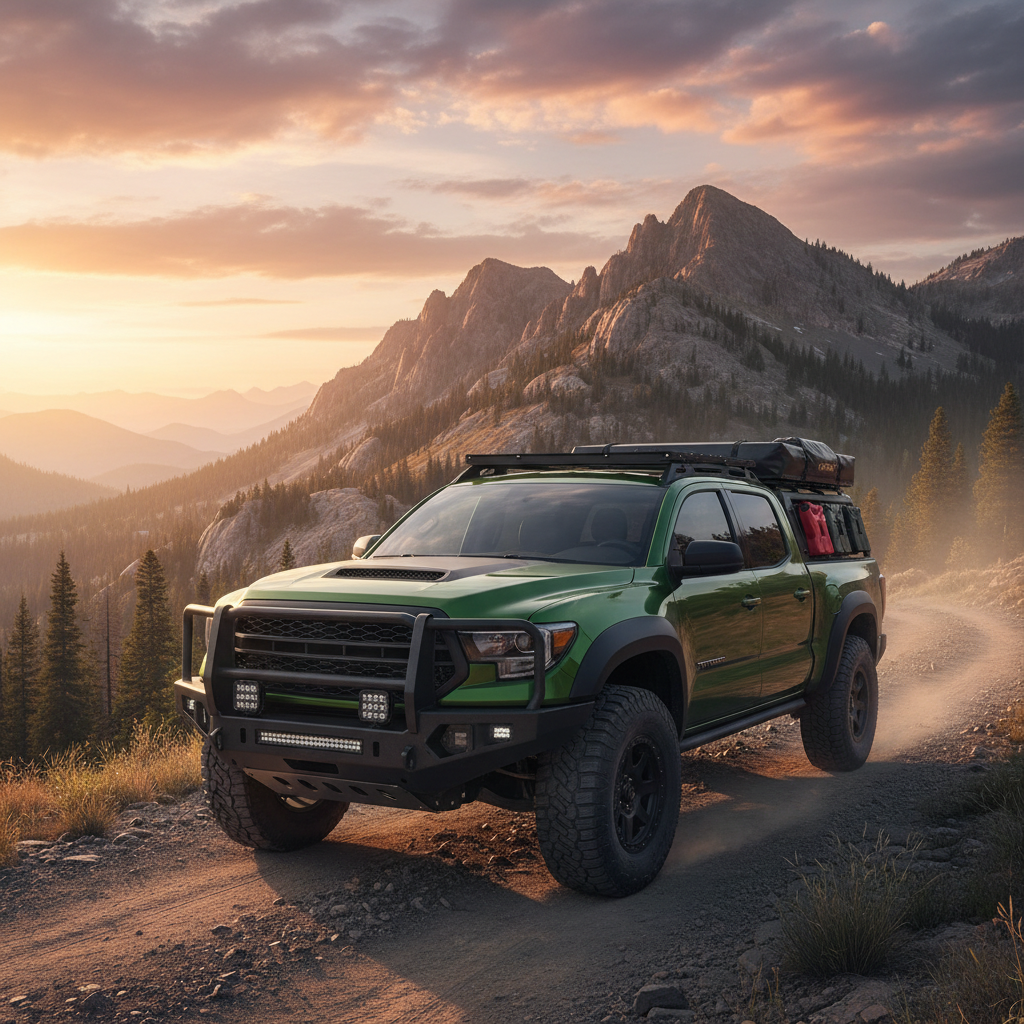
Installing a grille guard involves mounting heavy-duty steel brackets to your truck’s chassis and securing the protective assembly to provide a permanent barrier against front-end impacts. Your truck’s front end is its most vulnerable point, exposed daily to wildlife, road debris, and low-speed collisions. A single impact can pierce a radiator or crush expensive LED headlights, leading to thousands in repairs and weeks of operational downtime for your fleet. Professional grille guard installation transforms your vehicle into a fortified asset capable of withstanding the rigors of heavy-duty work and extreme off-road environments.
Why prioritize grille guard installation?
You should prioritize this upgrade because it provides a structural “insurance policy” that protects critical engine components and prevents costly downtime during minor accidents. Proper grille guard installation ensures that impact forces are distributed across the vehicle’s frame rather than being absorbed by the fragile radiator core.
Structural Shielding
A high-quality guard acts as the first line of defense for your truck’s most expensive components. It prevents brush, animals, and other vehicles from making direct contact with your grille.
Impact Distribution
Check this out:
- Energy is transferred to the frame rails.
- Brackets prevent the bumper from collapsing.
- Steel tubes shield delicate headlight housings.
Long-term Asset Value
The best part? Fortifying your truck today preserves its value for the future. You avoid the “scarring” on the vehicle’s history report that comes from repetitive front-end repairs.
Key Takeaway: Structural protection is an investment in vehicle longevity and operational reliability, specifically in high-risk zones.
| Protection Category | Primary Benefit | ROI Factor |
|---|---|---|
| Mechanical | Shields radiator/cooling | High |
| Aesthetic | Prevents paint chips/dents | Medium |
| Structural | Preserves frame integrity | Maximum |
This guide helps you analyze which protection level best suits your specific deployment environment.
What tools are for grille guard installation?
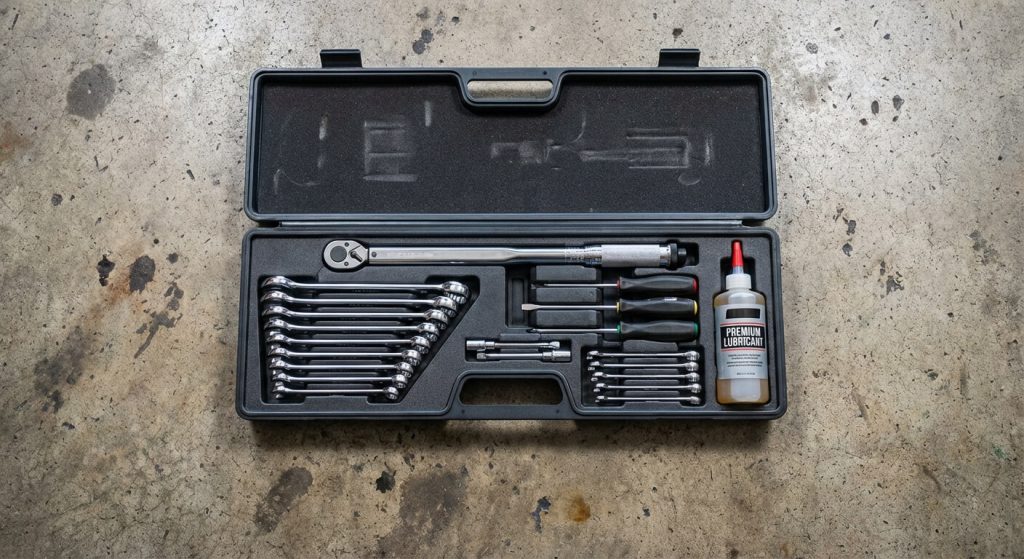
You need a comprehensive set of mechanics’ tools, including a socket set, torque wrench, and penetrating oil, to facilitate a secure grille guard installation. Utilizing the correct tools for grille guard installation prevents the stripping of bolts and ensures a professional-grade fit.
Basic Mechanics’ Essentials
You must have a full range of sockets, as many manufacturers use a mix of Metric and SAE hardware. A high-quality ratchet with extensions will help you reach recessed mounting holes.
Safety Gear and Support
Here is the deal:
- Heavy-duty gloves protect your hands from sharp frame edges.
- Safety glasses prevent debris from falling into your eyes while working underneath.
- Jack stands can provide extra support for the guard during the alignment phase.
Specialized Torque Tools
A torque wrench is non-negotiable for ensuring that all mounting hardware meets the manufacturer’s specifications. Failure to use one can lead to bolts backing out due to engine and road vibration.
Key Takeaway: Having the right tools on hand reduces installation time and guarantees the structural safety of the mounting hardware.
| Tool Name | Purpose | Necessity |
|---|---|---|
| Socket Set | Driving primary bolts | Mandatory |
| Torque Wrench | Safety verification | Mandatory |
| Penetrating Oil | Loosening old bolts | Recommended |
Use this tool list to prepare your workspace before beginning the physical mounting process.
How to prep for grille guard installation?
Preparation involves cleaning the frame rails, removing factory tow hooks, and organizing all mounting hardware to ensure a smooth grille guard installation. Skipping the prep phase often leads to alignment issues or cross-threaded bolts during the main grille guard installation steps.
Cleaning the Chassis
You must ensure the frame rails are free of mud, road salt, and excessive rust before mounting brackets. Use a wire brush to clean the surface around the pre-drilled factory holes.
Hardware Organization
You might be wondering:
- Why separate the bolts by size now?
- Does the side of the bracket matter?
- Should I keep the factory tow hook bolts?
Tow Hook Removal
Most guards require you to remove the existing factory tow hooks to access the primary frame mounting points. Save this hardware in case you need to revert to a stock configuration later.
Key Takeaway: A clean and organized preparation phase prevents mechanical failure and ensures the brackets sit flush against the frame.
| Prep Step | Expected Time | Benefit |
|---|---|---|
| Frame Cleaning | 15 Minutes | Prevents corrosion |
| Hook Removal | 20 Minutes | Clears mounting path |
| Hardware Sort | 10 Minutes | Eliminates confusion |
Evaluating your truck’s frame condition during this step allows you to address any existing corrosion before it is covered.
Is grille guard installation a two-person job?
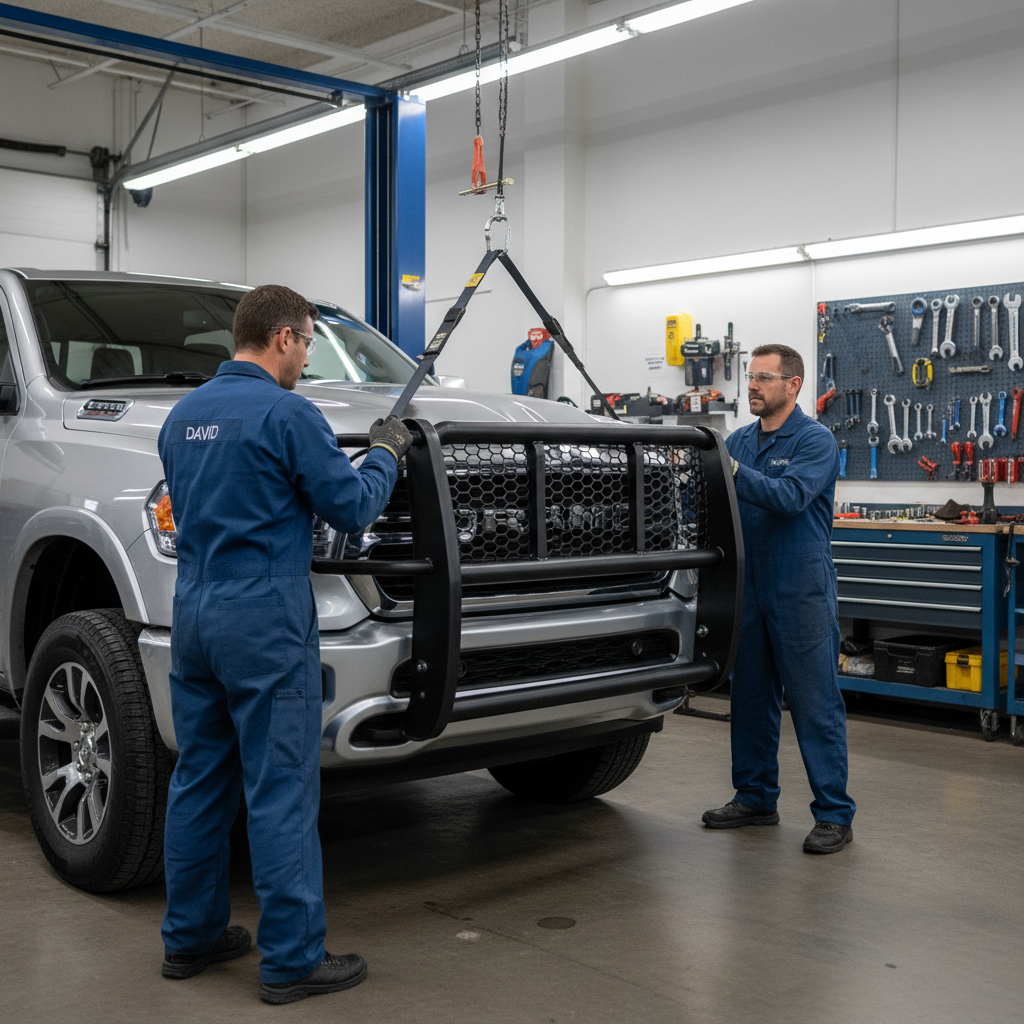
Yes, having a second person is highly recommended for grille guard installation to safely lift the heavy steel unit while you align the first bolts. Attempting a grille guard installation alone increases the risk of dropping the guard and damaging your truck’s bumper or paint.
Safety and Weight Management
Modern steel guards can weigh between 75 and 150 pounds, making them awkward to handle solo. Two people can maintain control and prevent the unit from tipping during the initial bolting process.
Precision Alignment
It gets better:
- One person holds the level.
- One person adjusts the bracket depth.
- Both verify the gap between the guard and the hood.
Avoiding Body Damage
Even a small slip can result in a deep gouge in your chrome or painted bumper. Having a partner ensures the guard stays away from the bodywork until the brackets are fully secured.
Key Takeaway: Two-person teams complete the installation 40% faster and with significantly fewer risks of cosmetic damage.
| Role | Responsibility | Essential Tool |
|---|---|---|
| Lead Installer | Bolt threading/Torque | Ratchet/Socket |
| Support Helper | Weight-bearing/Leveling | Spirit Level |
| Observer | Final fitment check | Tape Measure |
Analyze your team’s capacity to ensure you have the physical support needed to lift the guard safely.
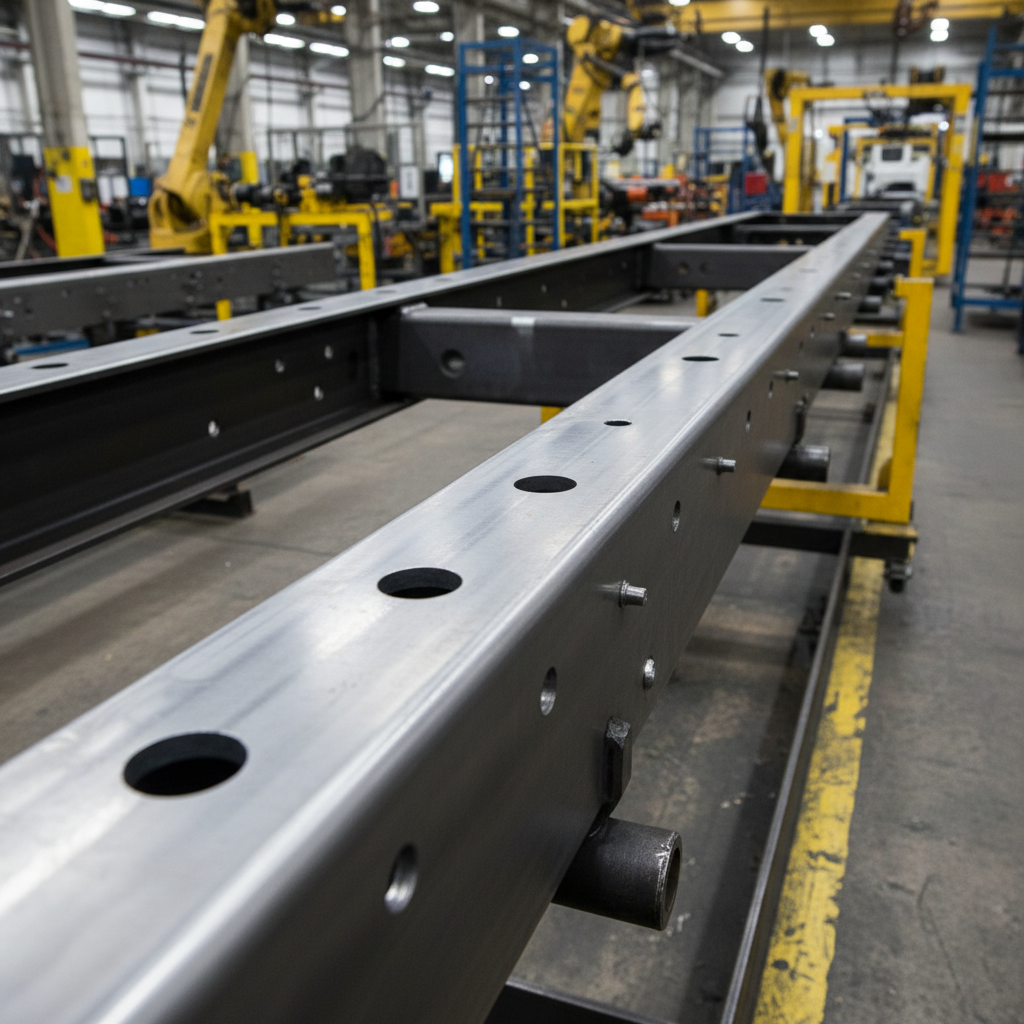
Where are brackets in grille guard installation?
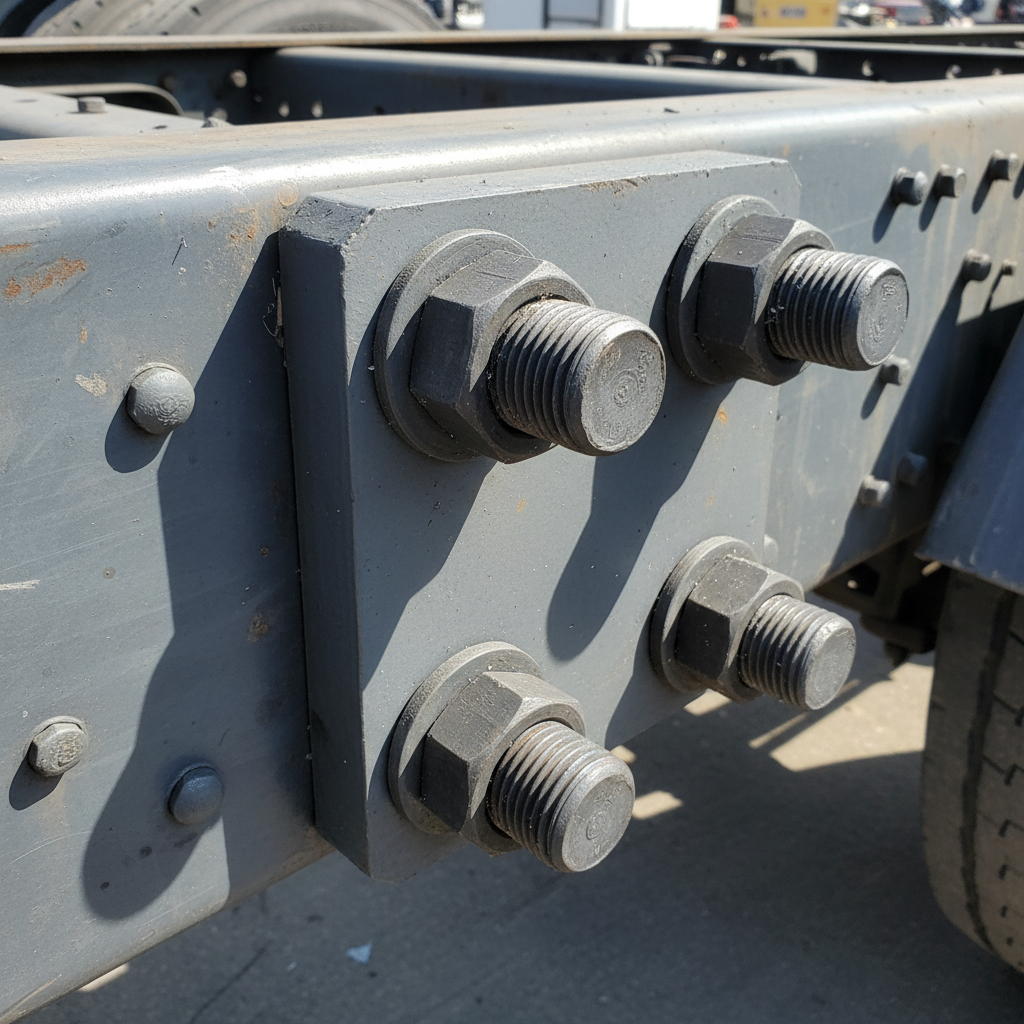
Mounting brackets are secured directly to the truck’s frame horns, which provides the necessary structural foundation for a successful grille guard installation. During a grille guard installation, you will typically find the mounting holes located just behind the front bumper.
Identifying Frame Holes
You should look for pre-existing circular or oval holes in the steel frame rails of your truck. These are engineered by the OEM specifically for heavy-duty accessories and tow hook attachments.
Lower Bracket Placement
Think about it:
- Lower brackets handle 80% of the load.
- They must be perfectly perpendicular to the ground.
- Washers must be used on both sides of the frame.
Upper Support Braces
Some full-width guards include upper braces that attach near the radiator support or through the grille. These prevents the guard from vibrating or “fluttering” at high highway speeds.
Key Takeaway: The strength of the entire system depends on the interface between the bracket and the vehicle’s frame.
| Bracket Type | Attachment Point | Bolt Size |
|---|---|---|
| Main Lower | Frame Rail | 1/2″ or 5/8″ |
| Upper Support | Radiator Frame | 3/8″ |
| Stabilizer | Bumper Mount | 3/8″ |
This table serves as a guide to help you verify that you are using the correct hardware for each bracket location.
How to align the grille guard installation?
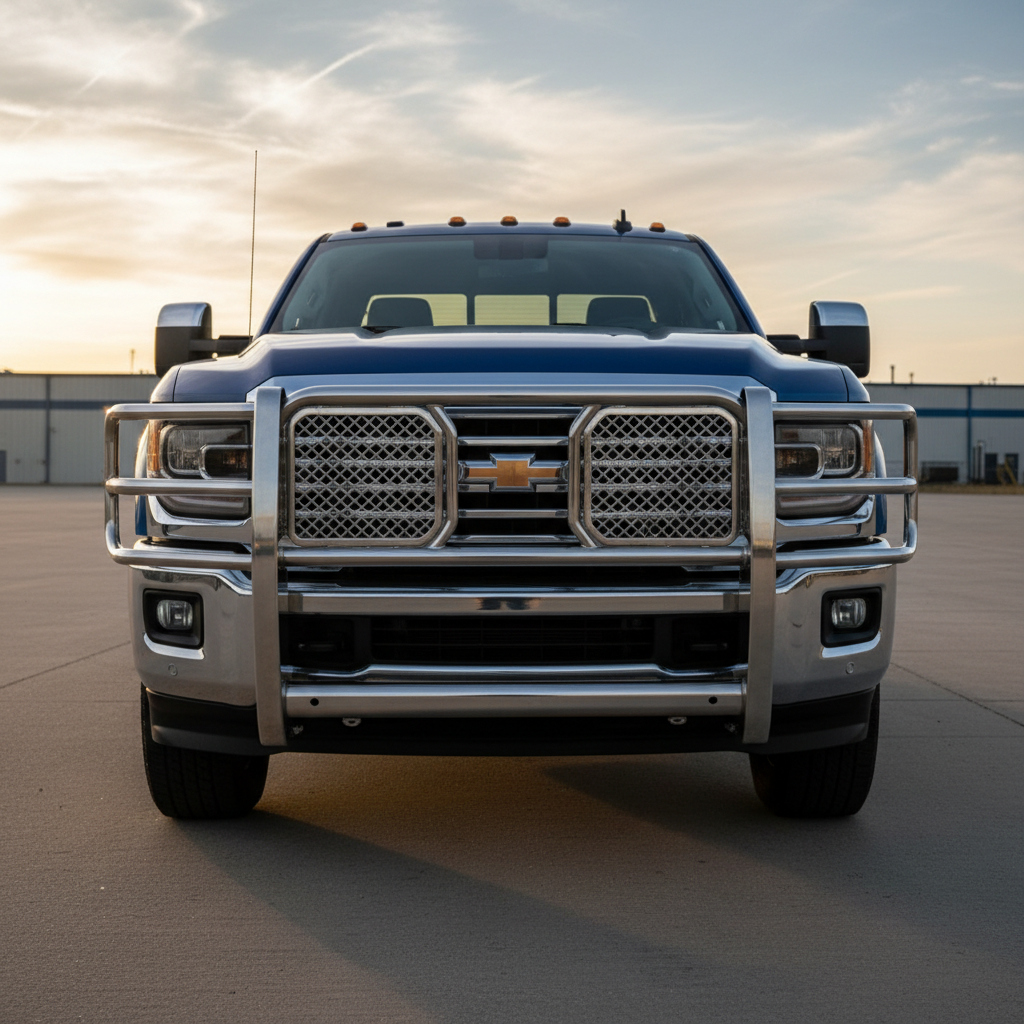
You achieve perfect alignment by keeping all hardware finger-tight until the unit is centered relative to the truck’s headlights and hood during grille guard installation. Misalignment during grille guard installation can result in annoying vibrations or interference with the truck’s safety sensors.
Measuring Gap Space
You must maintain a minimum gap of half an inch between the guard and the vehicle’s body. This space allows the truck’s frame to flex naturally when driving over uneven terrain without the guard hitting the paint.
Vertical Tilt Adjustment
Look:
- Level the horizontal crossbars.
- Tilt the guard to match the rake of the grille.
- Verify the headlights are not obstructed by the mesh.
Final Centering Check
Use a tape measure to check the distance from the outer edge of the guard to the fender on both sides. A centered guard is not just about looks; it ensures balanced protection during an impact.
Key Takeaway: Precision alignment prevents mechanical interference and ensures the guard provides symmetrical protection across the front end.
| Alignment Metric | Target Spec | Adjustment Method |
|---|---|---|
| Body Clearance | 0.5″ – 1.0″ | Slotted Brackets |
| Horizontal Level | 0.0 Degrees | Bracket Shims |
| Centering | < 0.25″ Offset | Lateral Slide |
Ensure you analyze the visual symmetry from at least 15 feet away before performing the final torque-down.
Does tech affect grille guard installation?
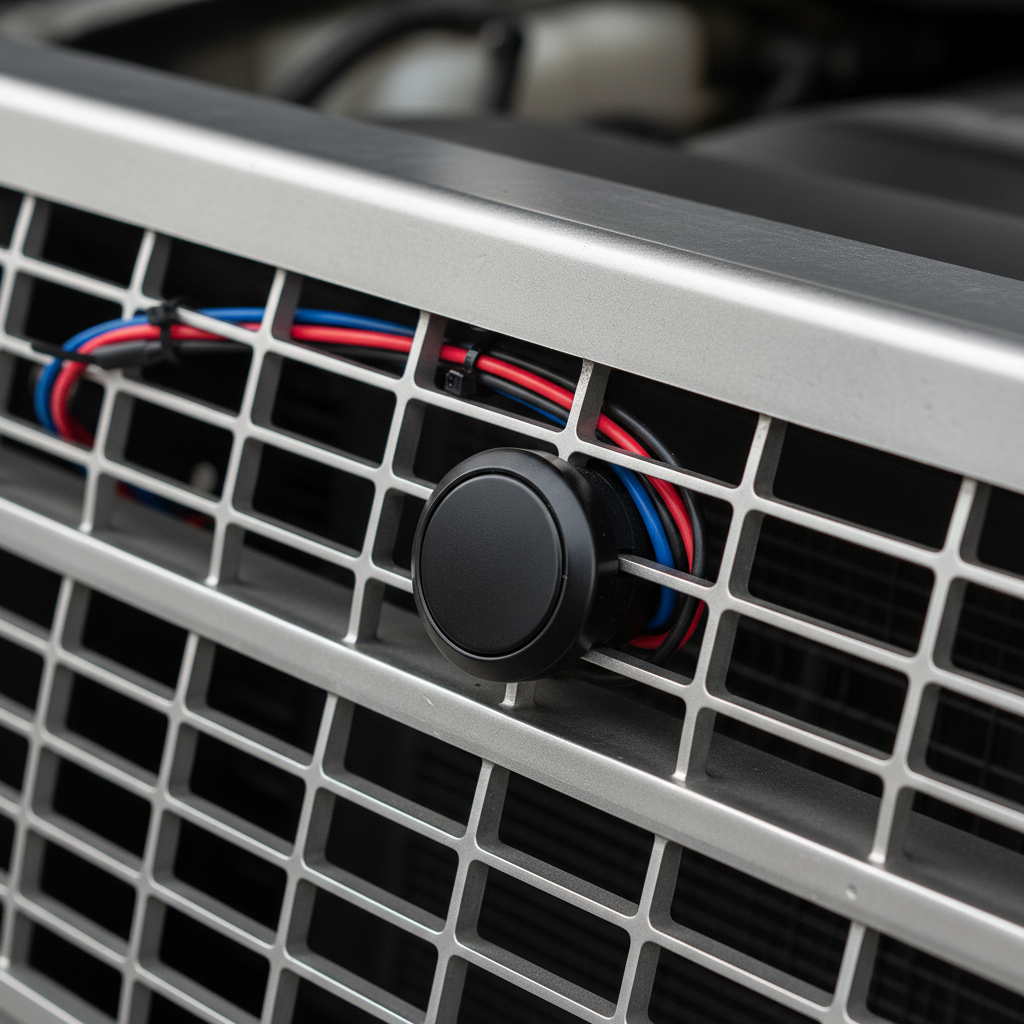
Modern tech packages like parking sensors and adaptive cruise control can be obstructed by the steel bars, requiring careful planning during grille guard installation. If your grille guard installation blocks a radar sensor, it may disable your truck’s advanced safety features.
Parking Sensor Integration
Many guards feature pre-drilled holes or relocation kits for front proximity sensors. You may need to extend the wiring harness to reach the new sensor pods on the guard’s uprights.
Adaptive Cruise Control
Here is the kicker:
- Radar units are often in the lower grille.
- Mesh patterns must be clear in the center.
- Relocation kits maintain factory safety calibration.
Camera View Clearance
If your truck has a 360-degree camera system, the guard’s top bar might appear in the video feed. Choosing a low-profile center section can help preserve your visibility during tight maneuvers.
Key Takeaway: Tech integration is the most complex part of modern installations and often requires specific accessory relocation hardware.
| Technology | Potential Issue | Solution |
|---|---|---|
| Radar (ACC) | System Failure | Clear-path Mesh |
| Proximity | Constant Beeping | Sensor Extensions |
| Front Camera | View Obstruction | Split-rail Design |
Use this section to determine if your specific truck trim requires additional electronic relocation components.
Why does fitment matter in grille guard installation?
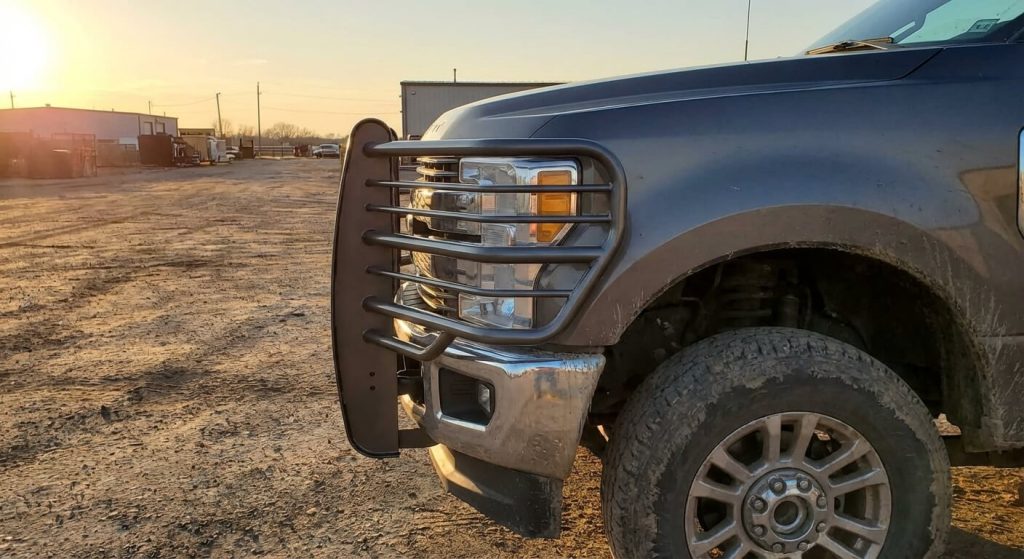
Precision fitment ensures that the guard absorbs energy efficiently without transferring damaging forces into your truck’s cosmetic panels during grille guard installation. A high-quality grille guard installation relies on manufacturing tolerances that match your vehicle’s exact model year and trim level.
CNC Machining Precision
Modern guards are built using laser cutting and CNC bending technology to ensure a 100% fitment guarantee. This precision eliminates the need for you to drill new holes into your truck’s frame.
Avoiding Metal-on-Metal Rub
Believe it or not:
- Poor fitment causes paint wear.
- Vibrations can loosen frame bolts.
- Noise increases inside the cabin.
No-Drill Efficiency
A true bolt-on design preserves your vehicle’s structural integrity and prevents rust from forming in newly drilled holes. This makes the installation reversible if you ever decide to sell the vehicle.
Key Takeaway: Perfect fitment is the difference between a guard that rattles and one that feels like a factory-integrated component.
| Fitment Factor | Indicator of Quality | Business Impact |
|---|---|---|
| Bolt Alignment | No drilling required | Faster Install |
| Finish Durability | Multi-stage powder coat | Less Maintenance |
| Vibration Control | Rubber isolation pads | Better Driver Comfort |
Analyze the manufacturer’s engineering standards to ensure the guard is rated for your truck’s specific weight class.
How to torque bolts in grille guard installation?
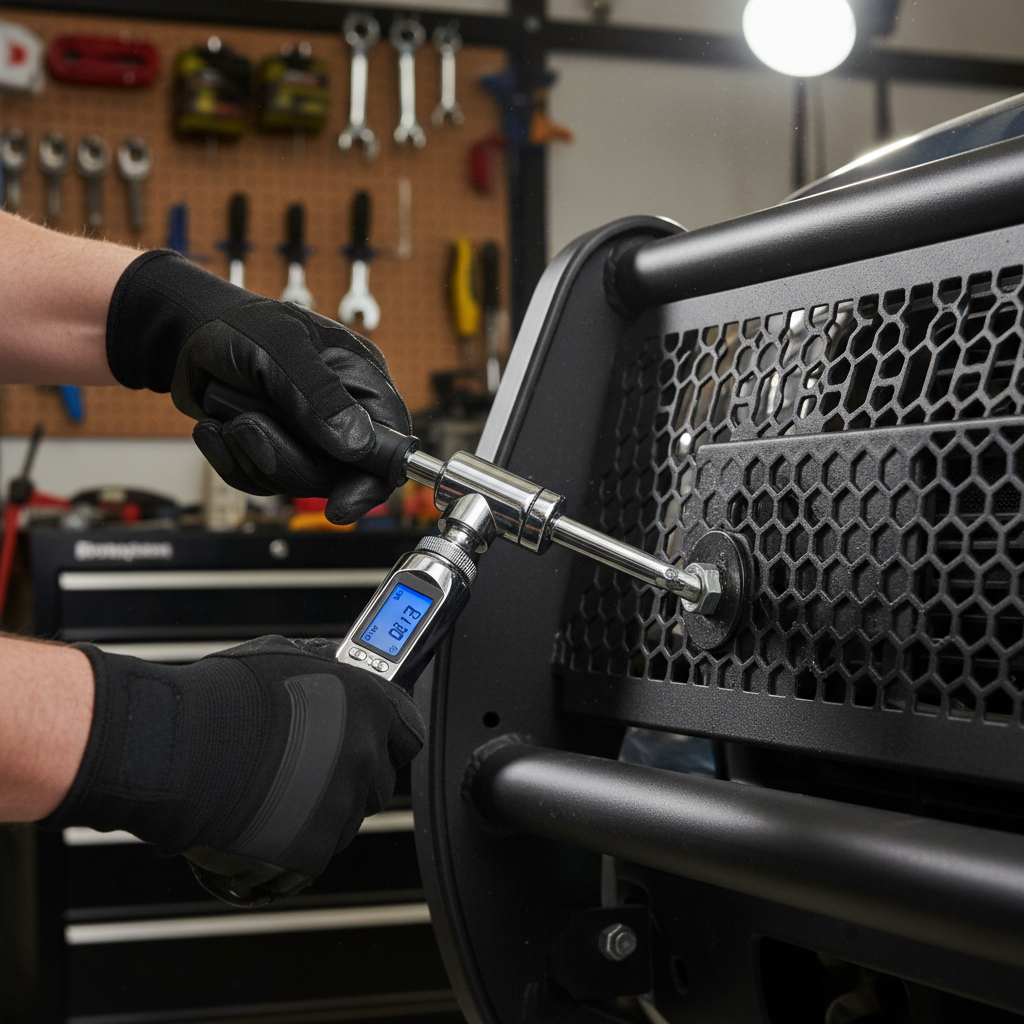
You must use a torque wrench to tighten all hardware to the specified foot-pounds to ensure a safe and permanent grille guard installation. During the final stage of grille guard installation, verifying the tension on every bolt prevents the unit from shifting under heavy load.
Using Thread Locker
Applying a medium-strength (blue) thread-locking compound to all mounting bolts is a best practice for heavy-duty trucks. This prevents the “vibration back-out” that commonly occurs on diesel engines and off-road vehicles.
Meeting Torque Specs
Simply put:
- 1/2″ Bolts: 65-75 ft-lbs.
- 5/8″ Bolts: 110-120 ft-lbs.
- 3/8″ Braces: 30-35 ft-lbs.
Gradual Tightening Pattern
Tighten the bolts in a cross-pattern to ensure the brackets seat evenly against the frame. This method prevents the guard from being pulled out of alignment as the hardware reaches full tension.
Key Takeaway: Proper torque is the only way to guarantee the guard will perform as intended during a high-energy impact event.
| Hardware Size | Torque Spec (ft-lbs) | Thread Locker Type |
|---|---|---|
| Small Brace | 30 | Blue (Removable) |
| Medium Bolt | 75 | Blue (Removable) |
| Large Frame Bolt | 120 | Blue (Removable) |
This guide ensures that your hardware remains secure through thousands of miles of road vibration and temperature cycles.
How to inspect the grille guard installation?
A thorough inspection involves a “shake test” and a hood clearance check to confirm that your grille guard installation is ready for the road. After completing the grille guard installation, you should perform a final walkthrough to verify that no tools or debris were left in the engine bay.
The Post-Install Shake Test
Grab the guard with both hands and attempt to move it; there should be zero movement or play in the brackets. If you hear a click or feel a shift, you must re-torque the frame-side bolts immediately.
Checking Hood Clearance
Look:
- Open the hood slowly.
- Check the safety latch reach.
- Ensure the grille doesn’t hit the guard.
Periodic Maintenance
You should re-check the bolt torque after the first 500 miles of driving. Road vibrations can cause the hardware to “seat” into the frame, occasionally requiring a final quarter-turn to maintain full tension.
Key Takeaway: Regular inspections ensure that your front-end protection remains a reliable safety feature throughout the life of the vehicle.
| Maintenance Task | Frequency | Expected Result |
|---|---|---|
| Visual Check | Monthly | No loose bolts/rust |
| Torque Check | Every 5k Miles | Bolts meet specs |
| Cleaning | During Car Wash | Prevents salt buildup |
Follow this inspection guide to keep your vehicle compliant with safety standards and fleet maintenance protocols.
Fortify Your Fleet Today
Completing a professional grille guard installation resolves the constant threat of front-end damage and prevents the logistical nightmare of vehicle downtime. At Brontec, we are dedicated to manufacturing the most rugged, high-precision truck protection products in North America to ensure your drivers stay safe and your assets stay operational. To discuss custom OEM programs or volume orders for your fleet, please contact us to connect with an account manager who understands the demands of heavy-duty trucking.
FAQ
Can I install a grille guard by myself?
It is possible but strongly discouraged because the weight and size make alignment difficult. Having a partner prevents the guard from slipping and scratching your truck’s bumper or headlights.
What is the best way to prevent rust on mounting bolts?
The best way is to use zinc-plated or stainless steel hardware and apply a thin layer of anti-seize or thread locker. Regularly washing road salt off the brackets also significantly extends the life of the finish.
Can I still use my factory tow hooks after installation?
In many cases, the guard brackets replace the tow hooks entirely. However, high-end manufacturers often design “integrated” brackets that allow you to reinstall the tow hooks over the new mounting hardware.
Will a grille guard void my vehicle warranty?
Generally, no, as most guards are bolt-on accessories that do not modify the engine or powertrain. However, you should check if the guard interferes with safety systems like airbags or sensor-based emergency braking.
Can I add a winch to a standard grille guard later?
Only if the guard is specifically “winch-ready” with a reinforced internal tray. A standard brush guard is designed for light impacts and is not structurally capable of handling the thousands of pounds of force generated by a winch.