Maintaining structural integrity in heavy-duty fleet environments is a constant challenge for maintenance managers. When high-impact components like moose bumpers or grille guards face extreme conditions, standard repair methods often fall short due to equipment complexity or environmental interference. Mastering Stick Welding provides your team with a versatile, rugged solution that ensures safety-critical parts remain operational regardless of the job site location.
What are the core benefits of Stick Welding?
Stick Welding offers unmatched portability and simplicity for outdoor or remote industrial applications where gas-shielded methods are impractical. This process is particularly effective for thick materials and can be performed in windy conditions that would dissipate shielding gas in other methods. By utilizing a flux-coated consumable electrode, it provides its own protection for the molten puddle during the fusion process.
Is portability its main advantage?
Portability is a primary driver for choosing this method in field repairs and heavy construction. Because the process does not require external gas tanks or wire feeders, a welder can easily carry the necessary tools into tight or elevated spaces.
- No bulky shielding gas cylinders required.
- Works effectively on rusty or dirty base metals.
- Simple equipment setup reduces downtime between tasks.
Let’s look closer.
Key Takeaway
Stick welding remains the gold standard for field reliability because it eliminates the logistical burden of gas management while maintaining high structural strength.
| Feature | Advantage |
|---|---|
| Gas Requirement | None (Self-shielding) |
| Portability | High (Single power source) |
| Surface Tolerance | High (Works on scaled steel) |
The evidence suggests that the reduction in auxiliary equipment directly correlates to increased mobility in demanding fabrication environments.
Which equipment is needed for Stick Welding?
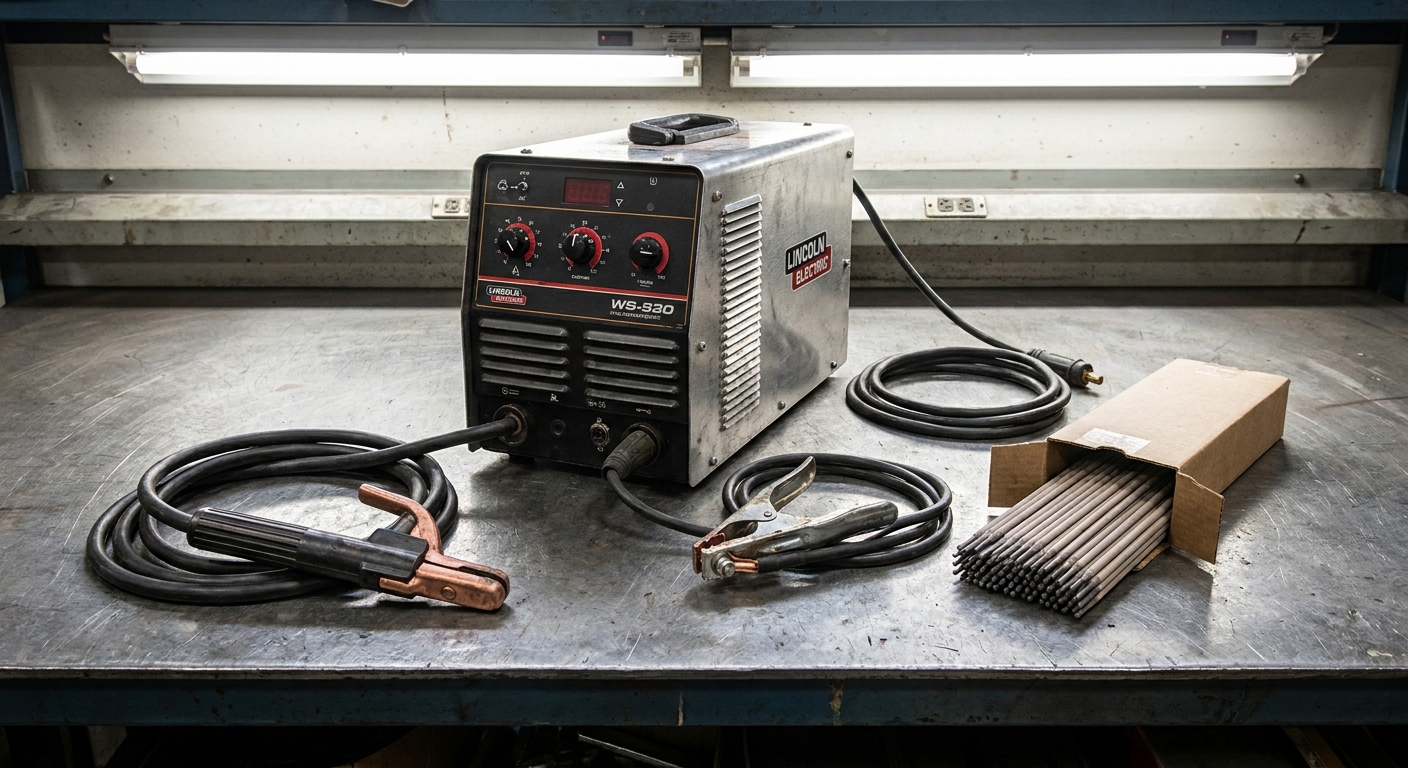
To begin Stick Welding, you require a constant-current power source, an electrode holder (stinger), a ground clamp, and heavy-duty cables. The power source provides the electrical energy necessary to create the arc, while the holder and clamp complete the circuit through the workpiece. High-quality leads are essential to minimize voltage drop and ensure a stable arc during long duty cycles.
What about the power source?
Modern inverter-based power sources provide superior arc control and energy efficiency compared to older transformer models. These machines often feature adjustable settings that help prevent the electrode from sticking to the workpiece during the start.
- Constant current (CC) output for stable heat.
- DC/AC polarity options for different electrodes.
- High open-circuit voltage for easier arc strikes.
Think about this.
Key Takeaway
Investing in a reliable CC power source is the foundation of high-quality manual arc welding, as it stabilizes the current regardless of minor arc length fluctuations.
| Component | Essential Function |
|---|---|
| Power Source | Provides constant current flow |
| Electrode Holder | Secures the consumable rod |
| Ground Clamp | Completes the electrical circuit |
Selecting the right machine ensures that the welder can maintain a consistent puddle even when environmental variables change.
How do you prepare metal for Stick Welding?
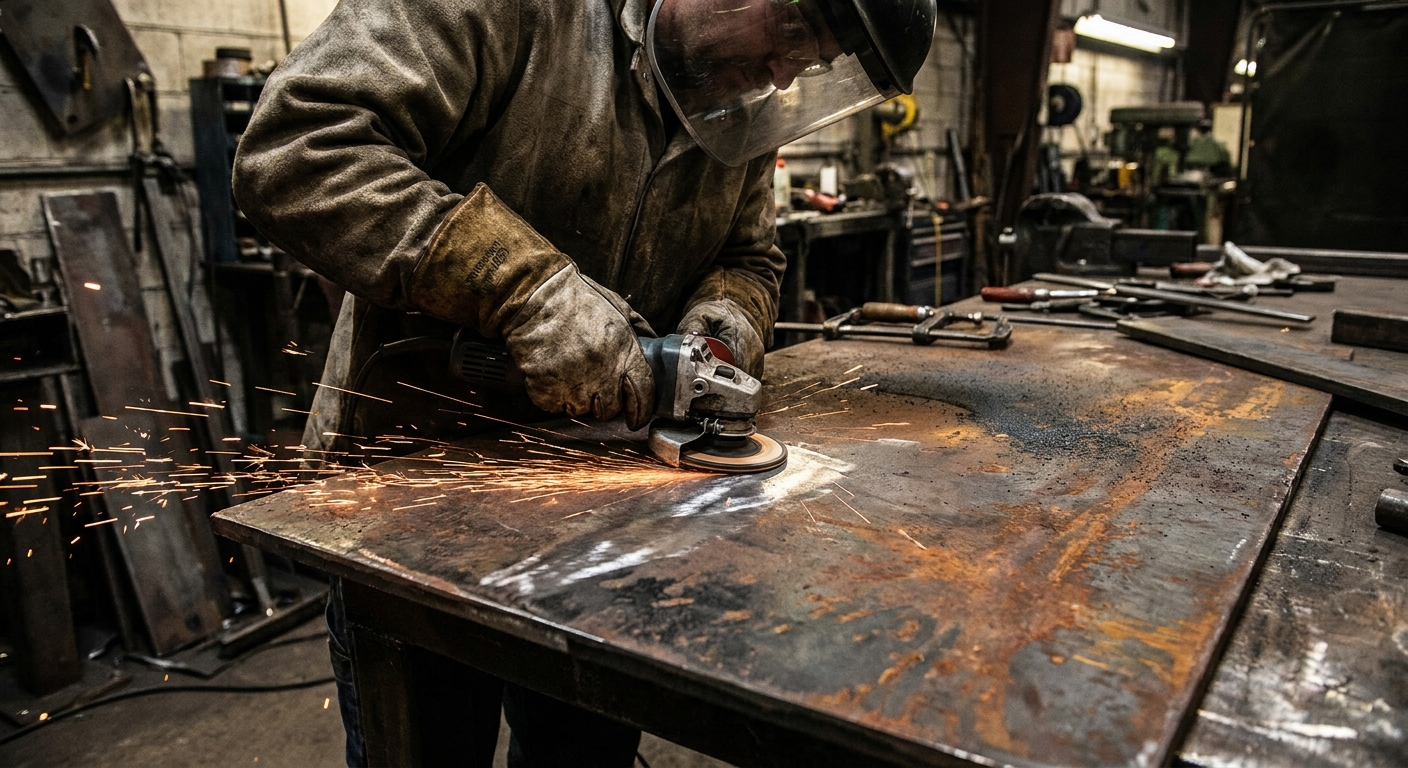
Proper Stick Welding begins with cleaning the base metal of oils, paint, and heavy scale to ensure maximum arc stability and penetration. While this process is more tolerant of surface contaminants than MIG or TIG, removing debris prevents porosity and inclusions in the final bead. A clean surface also facilitates a better electrical ground, which is crucial for maintaining a steady arc.
Why is cleanliness so critical?
Contaminants can lead to chemical reactions within the weld pool that weaken the mechanical properties of the joint. Cleaning the joint area with a wire brush or grinder ensures the flux can effectively remove any remaining impurities.
- Prevents gas pockets and internal porosity.
- Improves the wetting action of the molten metal.
- Reduces excessive spatter and cleanup time.
Here is the truth.
Key Takeaway
Thorough surface preparation is the most cost-effective way to prevent weld failure and ensure the structural integrity of safety-critical components.
| Step | Goal |
|---|---|
| Grinding | Removes thick rust and mill scale |
| Degreasing | Eliminates oils that cause hydrogen cracking |
| Fit-up | Ensures proper joint alignment |
Systematic preparation minimizes the risk of hidden defects, leading to a more predictable and durable fabrication outcome.
How do you select the right Stick Welding electrode?
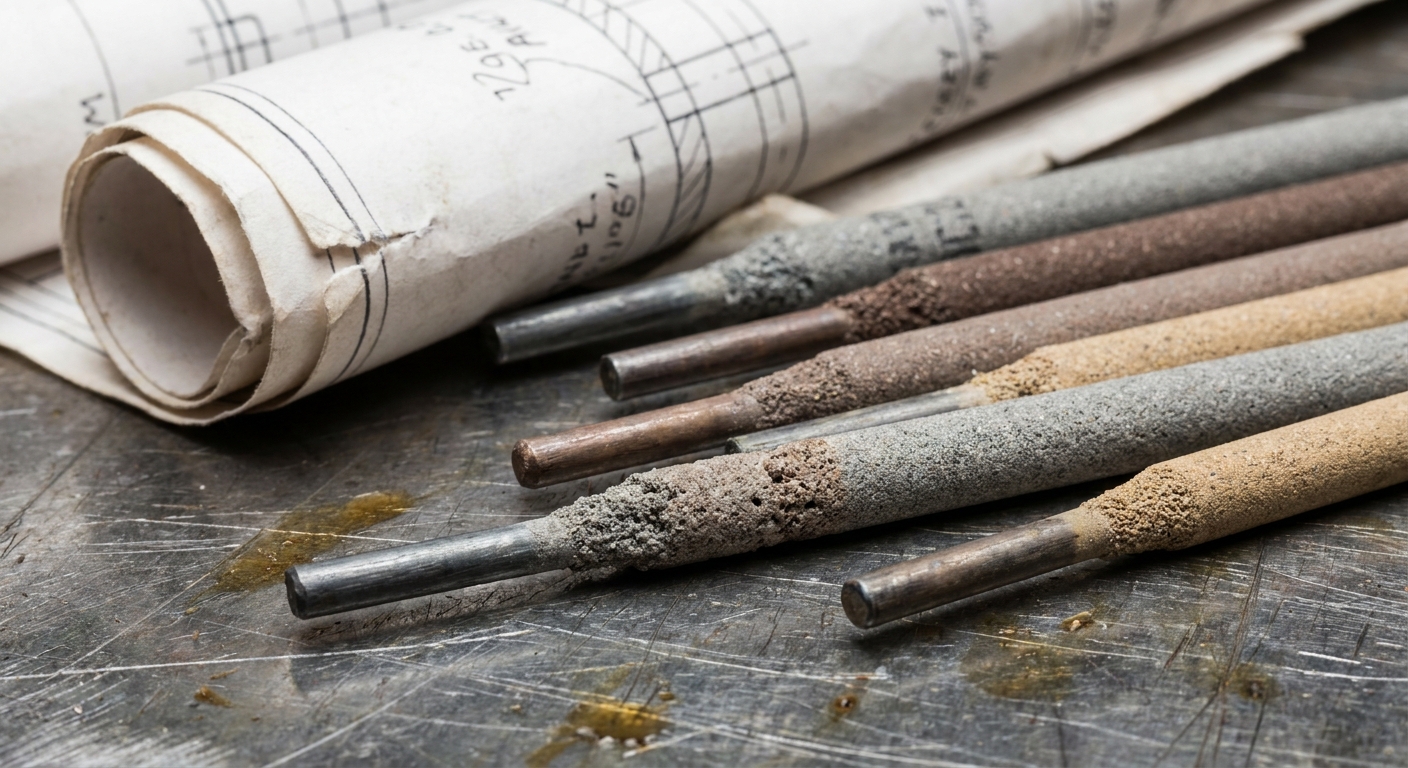
Choosing an electrode for Stick Welding depends on the base metal composition, the welding position, and the specific strength requirements of the project. Electrodes are classified by a standardized numbering system that identifies their tensile strength, position capabilities, and coating type. Selecting a rod that matches the mechanical properties of the base material is vital for preventing brittle fractures.
What do the AWS numbers mean?
The American Welding Society (AWS) numbers provide a blueprint for the performance characteristics of every rod. For example, an E7018 rod offers 70,000 psi of tensile strength and is suitable for all positions.
- First two digits indicate tensile strength.
- Third digit specifies the welding position.
- Fourth digit defines the coating and current type.
You might be wondering.
Key Takeaway
Correct electrode selection ensures that the weld metal’s strength matches or exceeds the base metal, providing a unified structural bond.
| Electrode | Primary Use |
|---|---|
| E6010 | Deep penetration, rusty metal |
| E7018 | High strength, low hydrogen |
| E6013 | General purpose, light sheet |
Analyzing the AWS classification allows you to tailor the welding process to the specific stresses the component will face in the field.
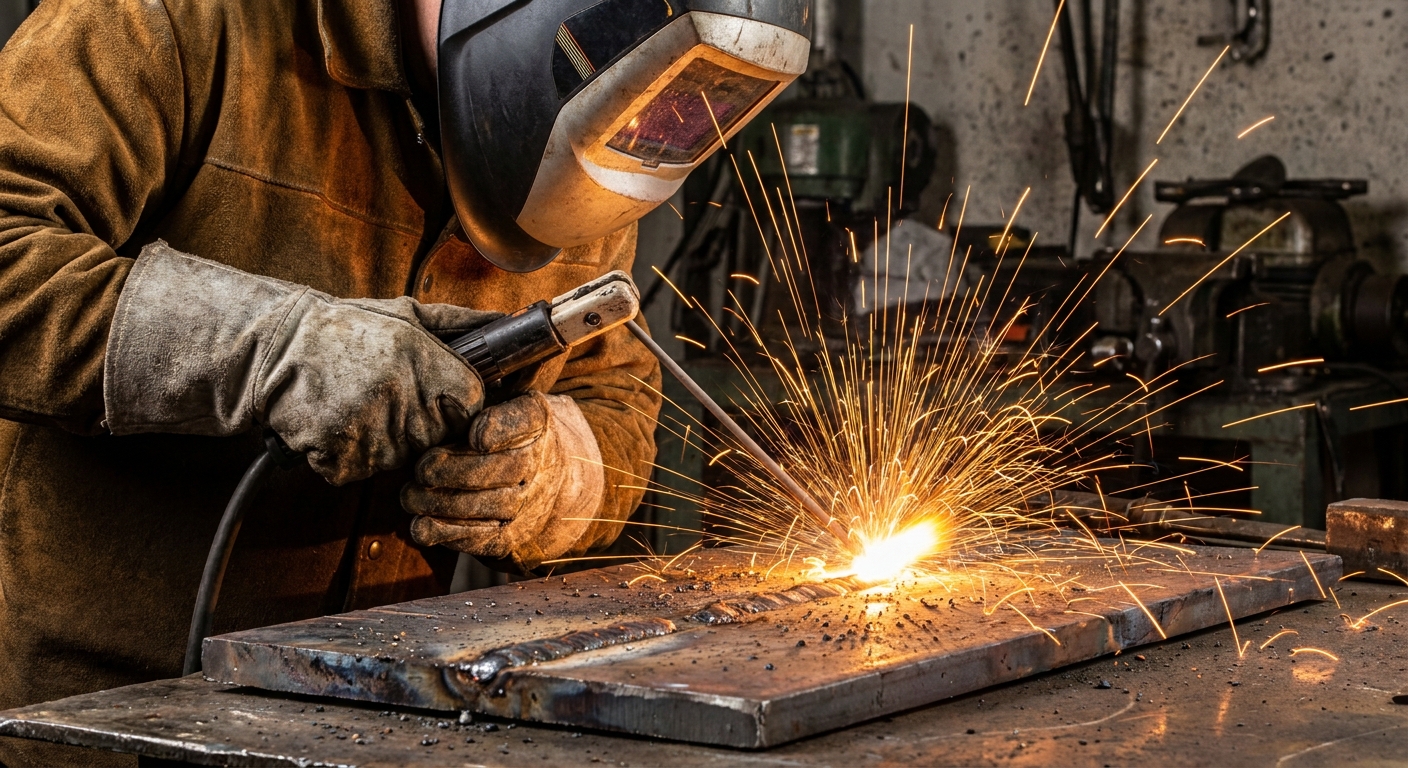
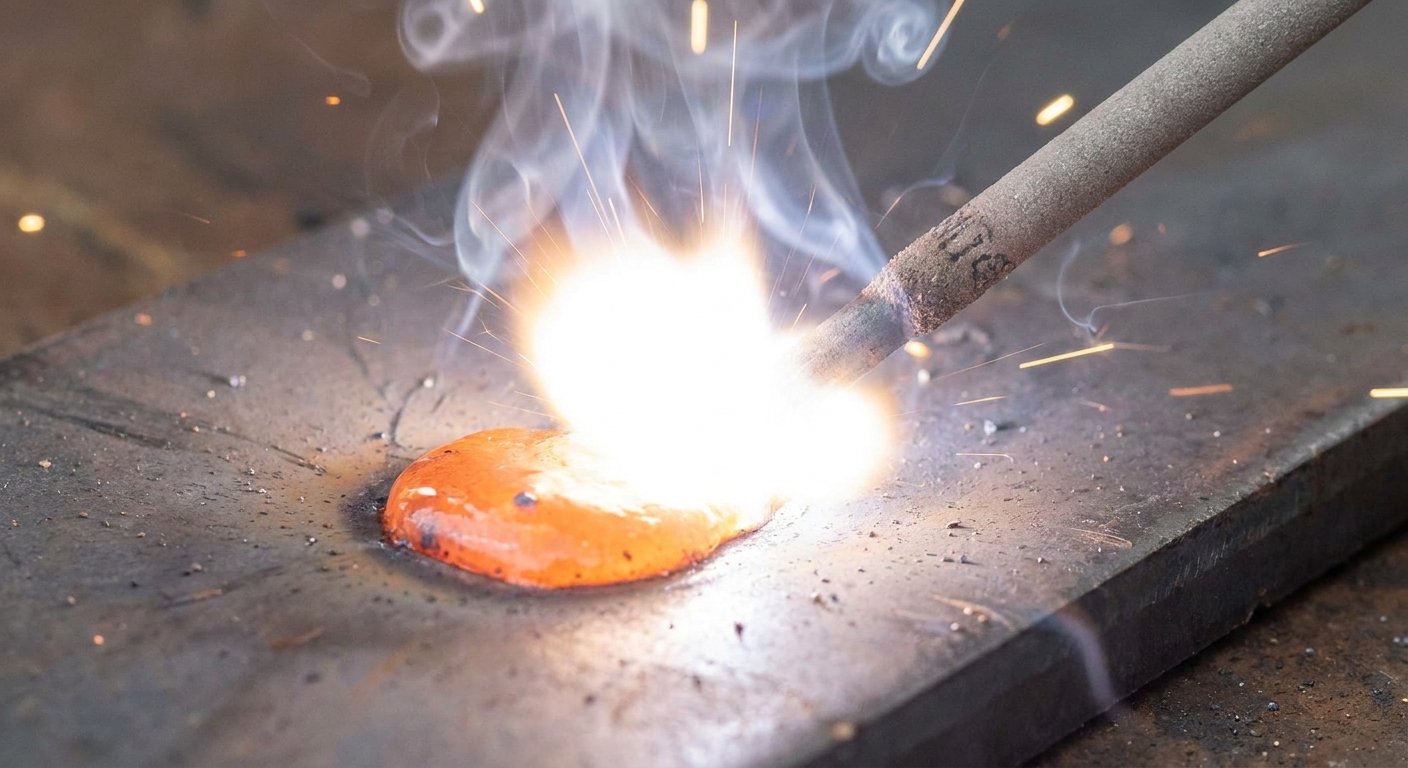
What is the best way to strike a Stick Welding arc?

To strike an arc in Stick Welding, you use a “match-strike” or “tapping” motion to initiate the electrical flow between the electrode and the work. This action must be quick and precise to prevent the electrode from freezing to the metal surface. Once the arc is established, you must immediately lift the electrode to the desired arc length to maintain the circuit.
Should you use the tap or scratch method?
The choice between tapping and scratching often depends on the welder’s preference and the condition of the metal surface. Tapping is generally more precise for clean joints, while the scratch method can help break through thin layers of oxide.
- Tapping involves a vertical motion like a hammer.
- Scratching mimics striking a match against a box.
- Proper lift-off prevents the rod from sticking.
It gets better.
Key Takeaway
Mastering the arc strike is the first step toward puddle control, as a clean start prevents arc strikes outside the joint that can weaken the metal.
| Method | Best For |
|---|---|
| Tapping | Precise placement on clean metal |
| Scratching | Breaking through surface oxidation |
| Back-stepping | Ensuring full fusion at the start |
Developing a consistent strike technique reduces material waste and improves the overall aesthetic and strength of the weld start.
How do you maintain the proper Stick Welding gap?
Maintaining a consistent arc length, typically equal to the diameter of the core wire, is essential for Stick Welding. If the gap is too large, the arc becomes unstable and creates excessive spatter, whereas a gap that is too small can cause the electrode to short out. You must constantly feed the electrode into the puddle as it consumes itself to keep this distance uniform.
Does gap distance affect heat?
The distance between the electrode tip and the workpiece directly influences the voltage and the amount of heat delivered to the joint. A consistent gap ensures that the penetration remains deep enough to fuse the root of the weld.
- Longer arcs increase voltage and heat.
- Shorter arcs cool the puddle and narrow the bead.
- Uniform distance prevents inconsistent penetration.
Make no mistake.
Key Takeaway
Precision in gap management allows the welder to fine-tune heat input on the fly, which is critical for handling varying metal thicknesses.
| Gap Status | Effect |
|---|---|
| Too Long | Unstable arc, high spatter, porosity |
| Too Short | Electrode sticking, narrow bead |
| Correct | Stable arc, smooth ripples, deep fusion |
The relationship between arc length and voltage dictates that muscle memory is as important as machine settings for high-quality results.
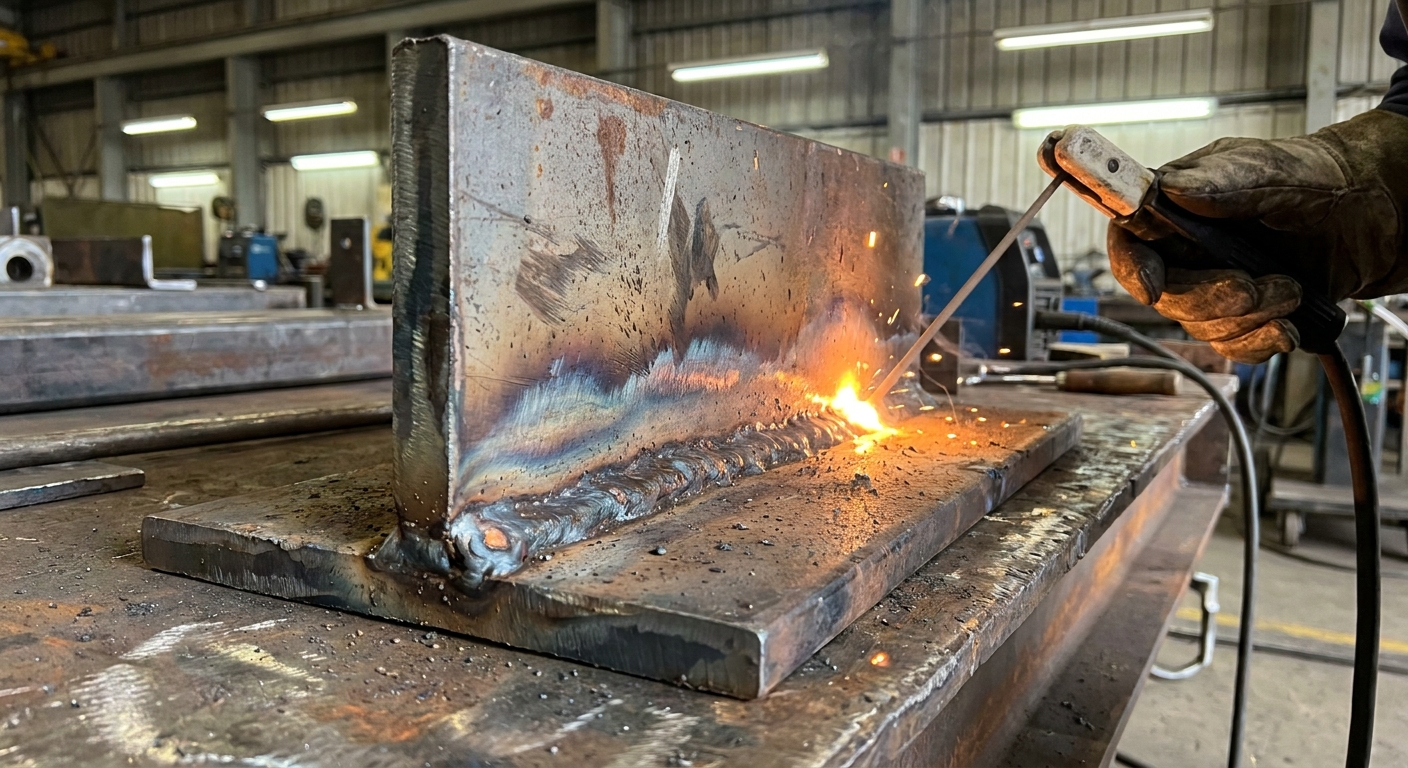
How do you control the Stick Welding bead?
Controlling the Stick Welding bead requires managing travel speed and electrode angle to achieve uniform ripples and depth. The travel speed must be slow enough to allow the metal to fuse properly but fast enough to prevent the puddle from becoming too wide. Observing the trailing edge of the puddle is the best way to monitor the bead’s progress and shape.
What is the ideal travel angle?
The angle of the electrode influences the direction of the arc force and the shape of the deposited metal. Most flat and horizontal welds require a slight drag angle to push the slag behind the molten puddle.
- Drag angle (5-10 degrees) for flat positions.
- Push angle for vertical-up to fight gravity.
- Correct tilt prevents slag inclusions in the bead.
That’s not all.
Key Takeaway
Consistent bead geometry is a visual indicator of a structurally sound weld, signifying even heat distribution and proper filler deposition.
| Variable | Target |
|---|---|
| Travel Speed | 1.5x to 2x electrode diameter width |
| Electrode Angle | 5 to 10 degrees from perpendicular |
| Puddle Shape | Rounded with even ripples |
By synchronizing movement with the melting rate of the electrode, the welder ensures the joint is reinforced without excessive build-up.
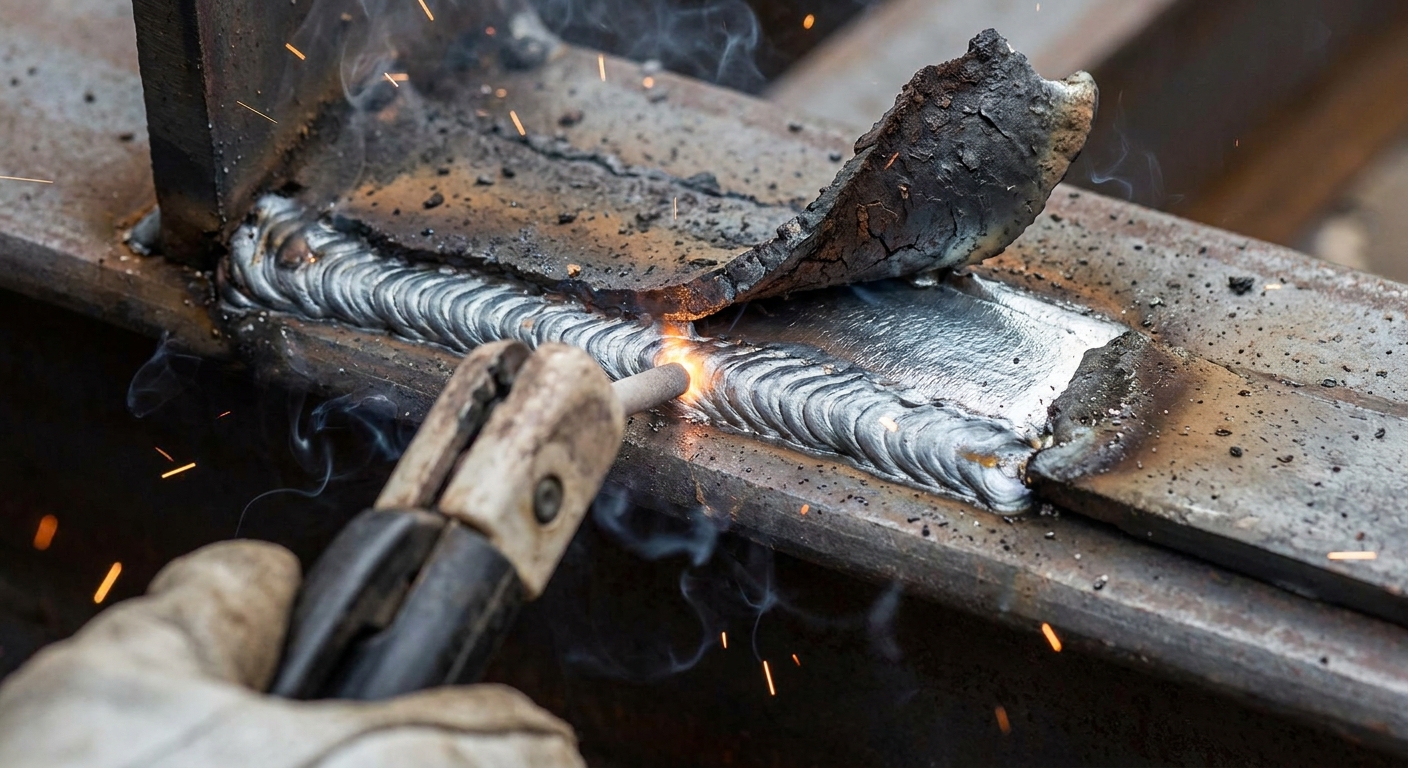
How do you ensure strong Stick Welding joints?
Achieving high-integrity joints in Stick Welding involves ensuring full penetration and effective slag removal between successive passes. In multi-pass welding, any remaining slag can become trapped inside the next layer, creating a weak point known as a slag inclusion. Using a chipping hammer and wire brush after every pass is a non-negotiable step for professional-grade fabrication.
Is slag removal mandatory?
Slag acts as a protective shield while the metal is molten, but it must be completely removed once the weld cools. Leaving slag behind hides defects and prevents the next pass from bonding with the previous layer.
- Reveals the actual bead profile for inspection.
- Prevents internal structural weaknesses.
- Ensures clean bonding for multi-pass fillets.
Believe it or not.
Key Takeaway
Mechanical cleaning of the weld between passes is just as important as the welding itself for ensuring long-term durability under heavy loads.
| Tool | Usage |
|---|---|
| Chipping Hammer | Breaking off thick slag crust |
| Wire Brush | Removing fine particles and soot |
| Angle Grinder | Smoothing restarts and removing deep slag |
The integrity of a heavy-duty joint is only as strong as its cleanest layer, making post-pass cleaning a vital safety protocol.
Which safety gear is vital for Stick Welding?
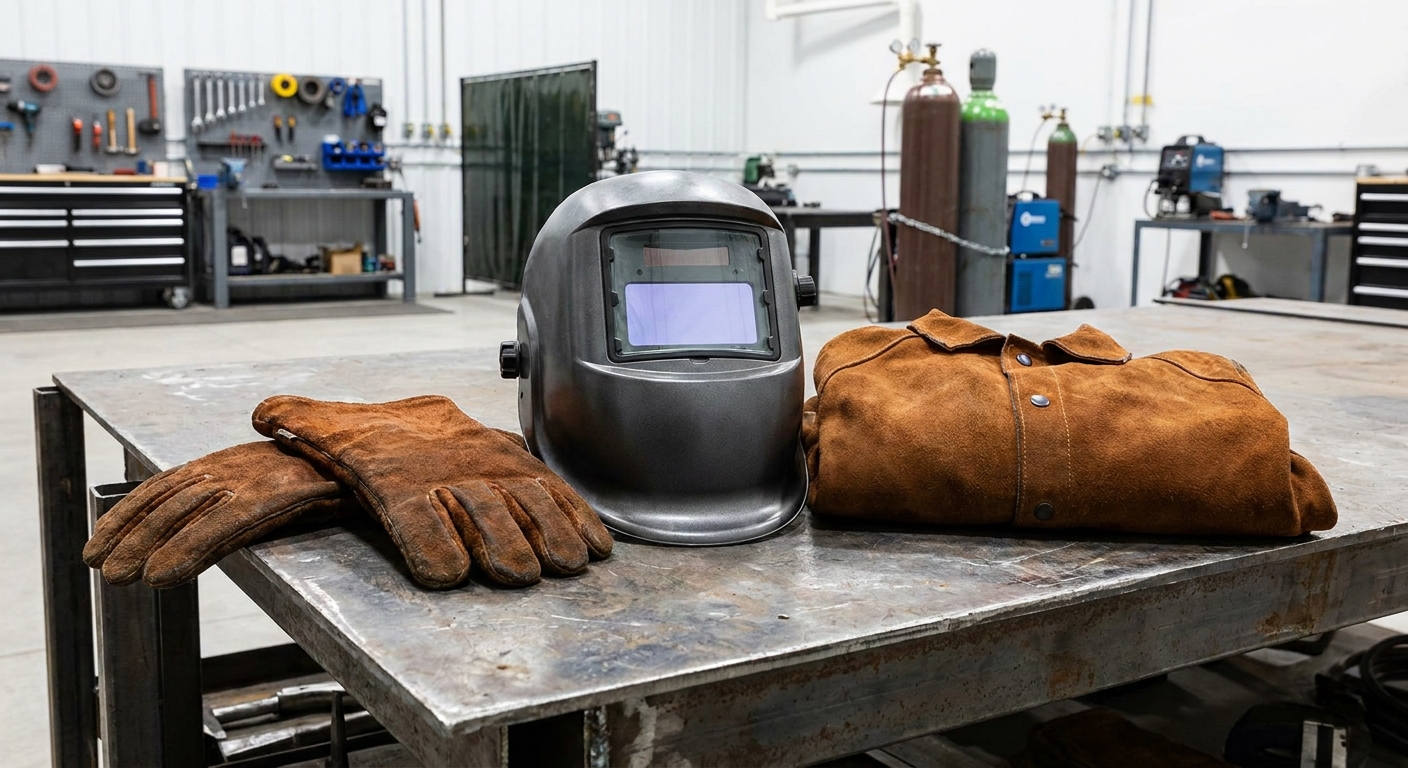
Personnel performing Stick Welding must wear an auto-darkening helmet, leather gloves, and flame-resistant clothing to prevent severe burns and eye damage. The arc emits intense ultraviolet (UV) and infrared (IR) radiation that can cause “welder’s flash” or skin burns within seconds of exposure. High-quality personal protective equipment (PPE) also shields the operator from hot spatter and flying slag during cleaning.
Why use a specific welding helmet?
An auto-darkening helmet allows you to see the workpiece clearly before the arc is struck and instantly darkens when sensors detect the light. This technology improves accuracy and reduces the neck strain caused by constantly flipping a traditional hood.
- Blocks 100% of harmful UV/IR radiation.
- Protects the face from high-heat spatter.
- Adjustable shade levels for different amperages.
Consider this.
Key Takeaway
Quality safety gear is an investment in operator longevity and shop productivity, as it prevents costly injuries and medical leave.
| PPE Item | Protection Provided |
|---|---|
| Auto-Dark Helmet | Eye protection and facial shielding |
| Leather Gauntlets | Hand and wrist heat protection |
| FR Jacket | Body protection from sparks and UV |
Safety standards in industrial welding ensure that technical precision is never compromised by avoidable physical hazards.
What are the standard Stick Welding parameters?
Setting the correct amperage based on electrode diameter and thickness is the foundation of successful Stick Welding. Each electrode has a recommended current range provided by the manufacturer that ensures the rod melts efficiently without overheating. If the amperage is too low, the arc will be hard to start; if it is too high, the electrode will glow and the flux will fail.
How do you set the machine?
Finding the “sweet spot” usually involves starting in the middle of the recommended range and adjusting based on the behavior of the puddle. Factors like joint fit-up and material temperature may require minor tweaks to the settings.
- Consult the electrode packaging for amperage ranges.
- Adjust for metal thickness and position.
- Fine-tune based on arc sound and spatter levels.
Here is the secret.
Key Takeaway
Correct parameter calibration balances penetration depth with bead control, ensuring the weld is neither too cold nor excessively fluid.
| Electrode Size | Recommended Amperage (Typical) |
|---|---|
| 3/32″ (2.4mm) | 40 – 90 Amps |
| 1/8″ (3.2mm) | 90 – 150 Amps |
| 5/32″ (4.0mm) | 140 – 225 Amps |
A logical approach to setting parameters involves verifying the consumable requirements before adjusting the machine for the specific joint geometry.
*
Maintaining your fleet’s uptime requires more than just basic repairs; it demands structural excellence that survives the toughest road conditions. By mastering these stick welding fundamentals, you solve the problem of fragile repairs and inconsistent joint quality in safety-critical guards and bumpers. We provide the expertise and built-to-print manufacturing solutions that keep your heavy-duty equipment reinforced and ready for long-haul applications. Our vision is to empower fleet operators with the most durable protection systems in the industry through precision engineering and certified welding standards. To ensure your truck accessories meet these rigorous specifications, contact us today for a consultation on custom OEM solutions.
*
Stick Welding FAQ
Can I weld aluminum with a stick welder?
Yes, but it is challenging. Special aluminum electrodes are available, though they require high heat and fast travel speeds because aluminum dissipates heat much quicker than steel.
What’s the best electrode for a beginner?
The E6013 is widely considered the best for learning. It has a very stable arc, produces little spatter, and the slag is exceptionally easy to remove, making it ideal for general fabrication.
Can I stick weld in the rain?
No, you should never weld in wet conditions. Because stick welding involves high electrical current and a conductive environment, the risk of lethal electric shock to the operator is extremely high.
How do I stop my electrode from sticking?
Ensure your amperage is high enough for the rod size and use a quick “match-strike” motion. If it continues to stick, check your ground clamp connection for proper electrical contact.
What is the difference between DC+ and DC- polarity?
DC+ (electrode positive) provides deeper penetration and is used for most structural stick welding. DC- (electrode negative) concentrates more heat on the rod, resulting in faster deposition but shallower penetration.